Senior year brings countless photo opportunities—from official yearbook portraits to graduation announcements and social media updates. For many students, the graduation cap headband has become an essential accessory that bridges the gap between traditional graduation caps (which can be awkward for photos) and the desire to showcase graduation pride in senior portraits. These miniature decorative caps sit comfortably on the head like a headband while providing that iconic graduation look perfect for yearbook photos and senior recognition displays.
The challenge many students face: how do you wear a graduation cap headband to look polished rather than costume-like? Which hairstyles work best? When is it appropriate to wear one versus a full cap? And most importantly, how do you ensure your photos turn out yearbook-worthy rather than awkward?
This comprehensive guide covers everything you need to know about graduation cap headbands—from choosing the right style and positioning it properly to styling your hair for flawless photos. Whether you’re preparing for senior pictures, yearbook photo day, or creating content for your school’s digital recognition displays, you’ll learn how to wear this increasingly popular accessory with confidence and style.
Graduation cap headbands have surged in popularity precisely because they solve a real problem: traditional mortarboards are notoriously difficult to photograph well, often casting shadows on faces, sitting awkwardly on heads, or looking overly formal for certain photo contexts. The headband alternative provides graduation symbolism without the practical challenges of full caps.

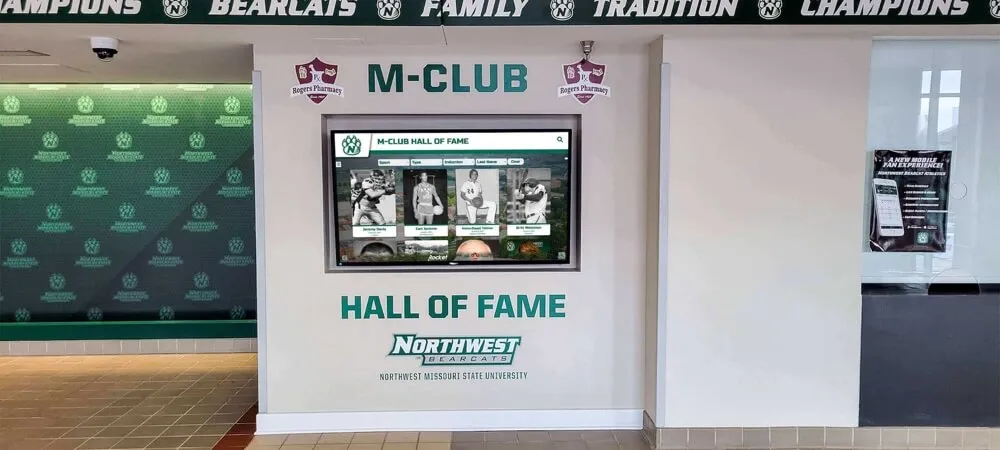
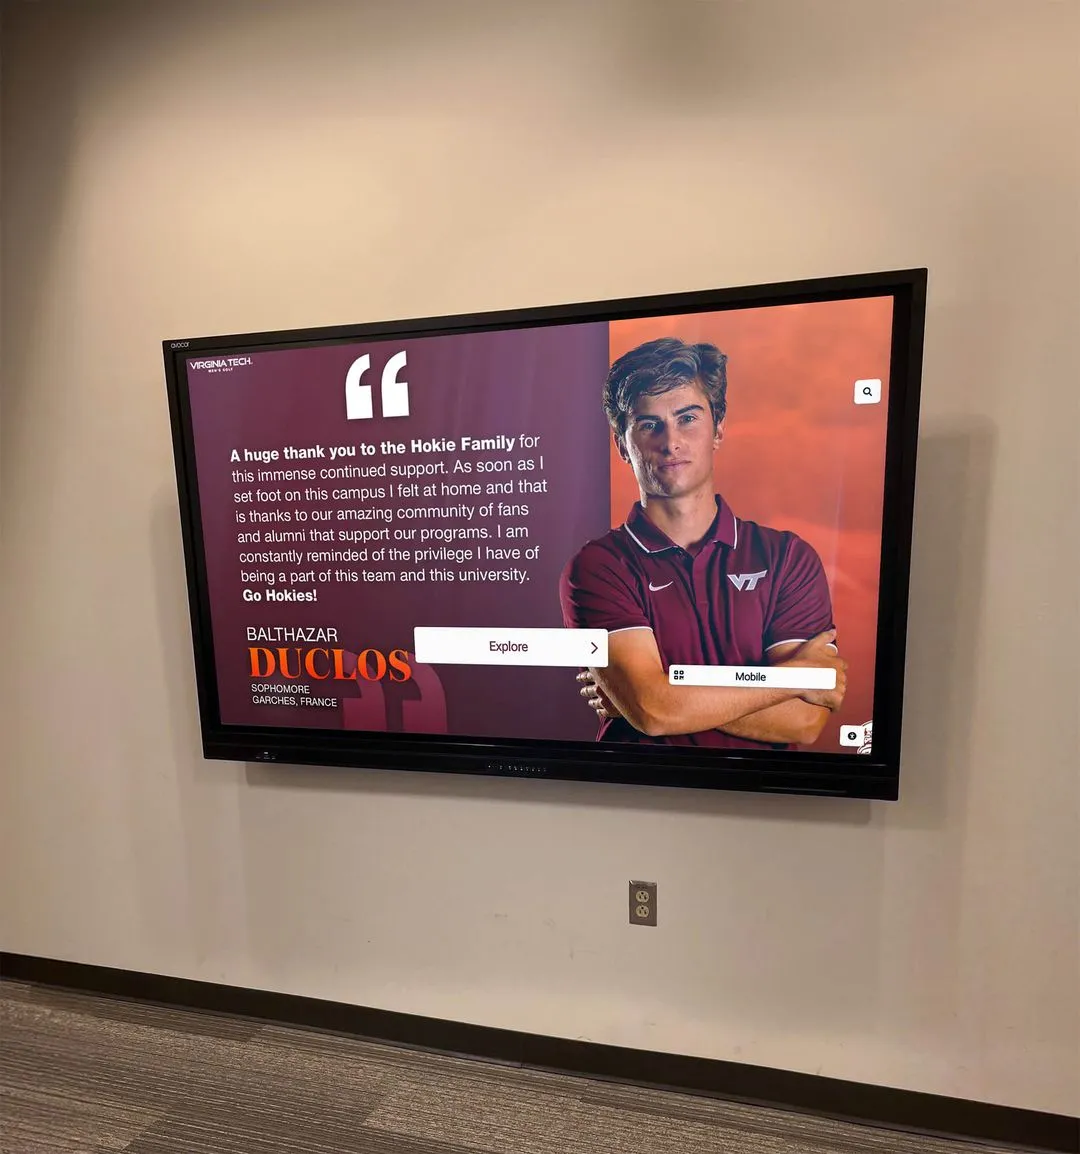
Graduation cap headbands have become popular for senior portraits that appear in yearbooks and digital recognition displays
What Is a Graduation Cap Headband and When Should You Wear One?
Before diving into styling techniques, understanding what graduation cap headbands are and their appropriate contexts helps you make informed decisions about incorporating them into your senior year photos.
Understanding Graduation Cap Headbands
A graduation cap headband (also called a grad cap headband or mini graduation cap) is a decorative hair accessory featuring a small-scale version of a traditional mortarboard graduation cap attached to a headband or clip. These accessories typically include the signature flat square cap board with a tassel, scaled down to approximately 3-5 inches across—large enough to be recognizable in photos but small enough to wear comfortably without the bulk and awkwardness of full-size caps.
Most graduation cap headbands come in several styles:
Traditional Headband Style: The miniature cap is affixed to a standard headband that wraps around the head from ear to ear. This style works well for most hair types and lengths, distributing weight evenly and staying secure throughout photo sessions.
Side Clip Style: Instead of a full headband, the mini cap attaches to a hair clip that can be positioned anywhere on the head—side, center, or back. This option offers more placement flexibility and works particularly well for elaborate updos or asymmetrical hairstyles.
Fascinator Style: Taking inspiration from formal hat fashion, these versions feature smaller caps mounted on combs or clips with additional decorative elements like bows, feathers, or ribbons. These tend toward the more decorative end of the spectrum and photograph beautifully for formal senior portraits.
Elastic Back Style: Some designs use elastic bands rather than rigid headbands, adjusting to different head sizes more easily and creating less pressure during extended wear for events like graduation parties.
When to Wear a Graduation Cap Headband
Understanding appropriate contexts helps you make choices that enhance rather than detract from your photos and events:
Senior Portrait Sessions: Professional senior portrait sessions represent the most common use case for graduation cap headbands. Many students include several outfit changes during sessions, and a grad cap headband works perfectly for the “graduation outfit” portion without requiring the bulk of a full cap. Photographers appreciate how these accessories photograph more easily than traditional mortarboards.
Yearbook Photo Day: If your school allows accessories for yearbook portraits, graduation cap headbands provide graduation symbolism while ensuring your face remains clearly visible without cap shadows. Always check your school’s yearbook photo policies before planning accessories. Schools increasingly display senior portraits on digital recognition systems alongside traditional yearbooks, making professional photos even more important.
Graduation Announcements and Invitations: When creating printed or digital graduation announcements, photos featuring graduation cap headbands clearly communicate the occasion while maintaining a polished, professional appearance.
Graduation Parties and Celebrations: For graduation open houses, parties, and celebrations, wearing a graduation cap headband throughout the event is far more practical than a full mortarboard. You can wear it comfortably for hours while remaining recognizable as the graduate being honored.
Social Media Content: Creating graduation-themed content for Instagram, TikTok, or other platforms? Graduation cap headbands photograph beautifully for social media while signaling your achievement without looking too staged or formal.
Recognition Events and Assemblies: Many schools host senior recognition events, awards ceremonies, or final assemblies where graduates are honored. A graduation cap headband provides appropriate symbolism without the formality of full regalia. These moments often appear in school digital displays celebrating graduating classes.

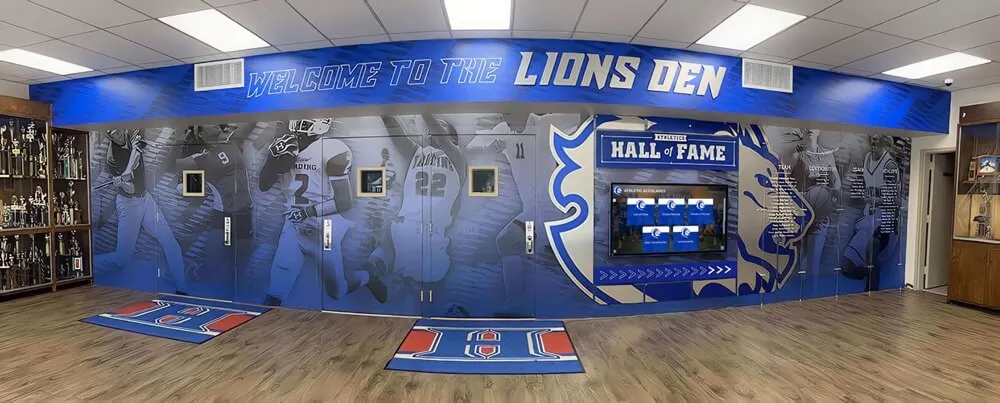
Schools increasingly feature senior portraits and graduation photos on permanent digital recognition displays
When NOT to Wear One: Save your graduation cap headband for appropriate contexts. Don’t wear it to the actual graduation ceremony (where full regalia is required), in casual school photos unrelated to graduation, or in contexts where it might appear costume-like rather than celebratory.
How to Position and Wear Your Graduation Cap Headband Properly
Proper positioning makes the difference between photos that look polished and professional versus awkward and costume-like. Here’s how to wear your graduation cap headband correctly for the best results.
Finding the Right Position
The positioning of your graduation cap headband significantly impacts how natural and polished it appears in photos:
Center Positioning (Most Common): For traditional headband styles, center the miniature cap directly on top of your head, positioned where a regular headband would sit—approximately one to two inches back from your hairline. This placement mimics where a traditional mortarboard would sit while keeping your face completely visible. The headband should rest comfortably behind your ears with the cap centered on your crown.
Slight Forward Tilt: Unlike traditional graduation caps that sit completely flat, graduation cap headbands often photograph better with a slight forward tilt—about 10-15 degrees. This angle helps the camera capture the cap’s square shape more clearly while preventing it from disappearing into your hair in photos. However, avoid tilting so far forward that it looks like it’s sliding off.
Side Placement: If using a clip-style grad cap headband, positioning it slightly off-center (about 30 degrees from center) creates visual interest and works particularly well with side-swept hairstyles or asymmetrical looks. This placement channels vintage fascinator styling while maintaining graduation symbolism.
Angled Placement: For a modern, fashion-forward look, position your graduation cap headband at a subtle angle—not perfectly parallel to your hairline, but rotated slightly. This works especially well for three-quarter portrait angles where the cap becomes a dynamic design element rather than sitting symmetrically.
Securing Your Headband for All-Day Wear
Nothing ruins a photo session or event faster than constantly adjusting a slipping headband. Here’s how to keep your graduation cap headband secure:
Hair Texture Matters: Clean, freshly washed hair can be slippery, making headbands slide more easily. If photographing the day after washing your hair, the natural oils provide better grip for accessories. Some students lightly tease hair at the crown before positioning headbands to create texture that helps prevent slipping.
Bobby Pin Anchoring: For extra security during important photo sessions, discreetly anchor your graduation cap headband with 2-4 bobby pins. Place pins at the sides where the headband sits behind your ears and, if needed, one at the back. Match bobby pin color to your hair color so they disappear in photos. This technique works particularly well for active events where you’ll be moving around.
Elastic vs. Rigid Bands: If you’re between sizes or find rigid headbands uncomfortable during extended wear, elastic-back graduation cap headbands adjust to your head size and maintain comfortable pressure without creating headaches during multi-hour events.
Grip Strips: Some headbands feature textured grip strips on the interior that help prevent slipping. If yours doesn’t, you can add clear grip tape (available at craft stores) to the interior of the band for improved hold.
Tassel Placement and Direction
The tassel on your graduation cap headband might seem like a small detail, but its positioning affects your overall look:
Pre-Graduation Positioning: Traditional etiquette suggests keeping your tassel on the right side until you officially graduate, then moving it to the left. For photos taken before graduation ceremonies, position your tassel on the right for technically correct symbolism.
Photographic Considerations: From a purely photographic perspective, consider which side of your face photographs better (most people have a slight preference). Position your tassel on the opposite side of your “good side” to avoid it obscuring your face in portraits. For three-quarter angle portraits, draping the tassel toward the camera side creates pleasant visual lines.
Tassel Length: Some graduation cap headbands feature full-length tassels matching actual mortarboards, while others use shorter decorative versions. Longer tassels create more dramatic photos but can get in the way during events. Shorter tassels offer better practicality while maintaining symbolism.

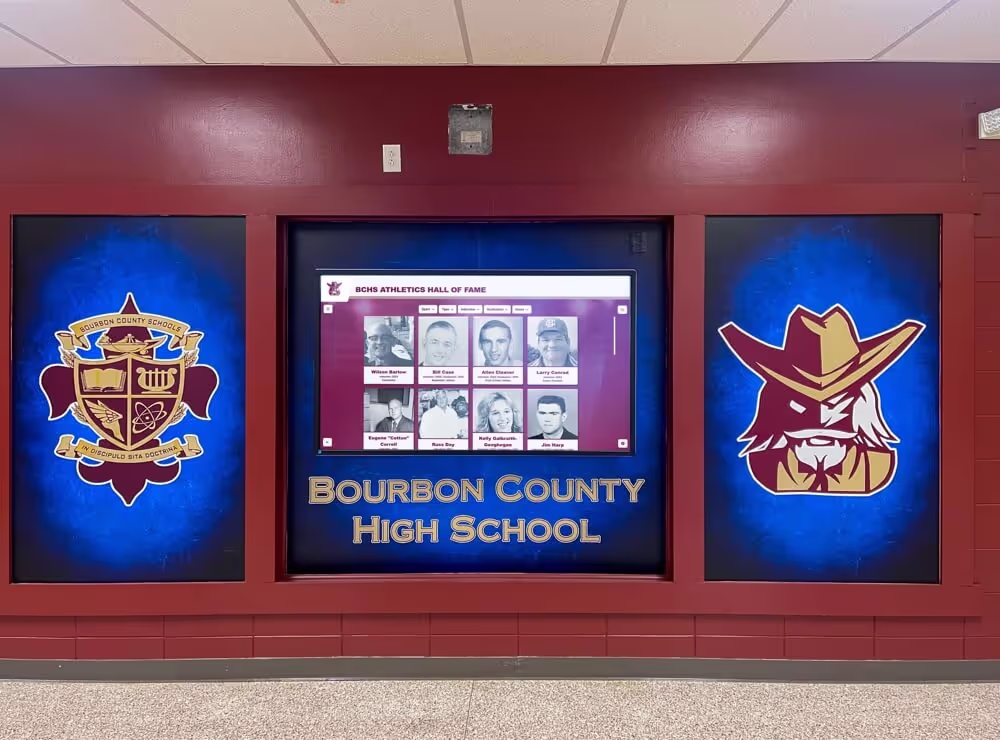
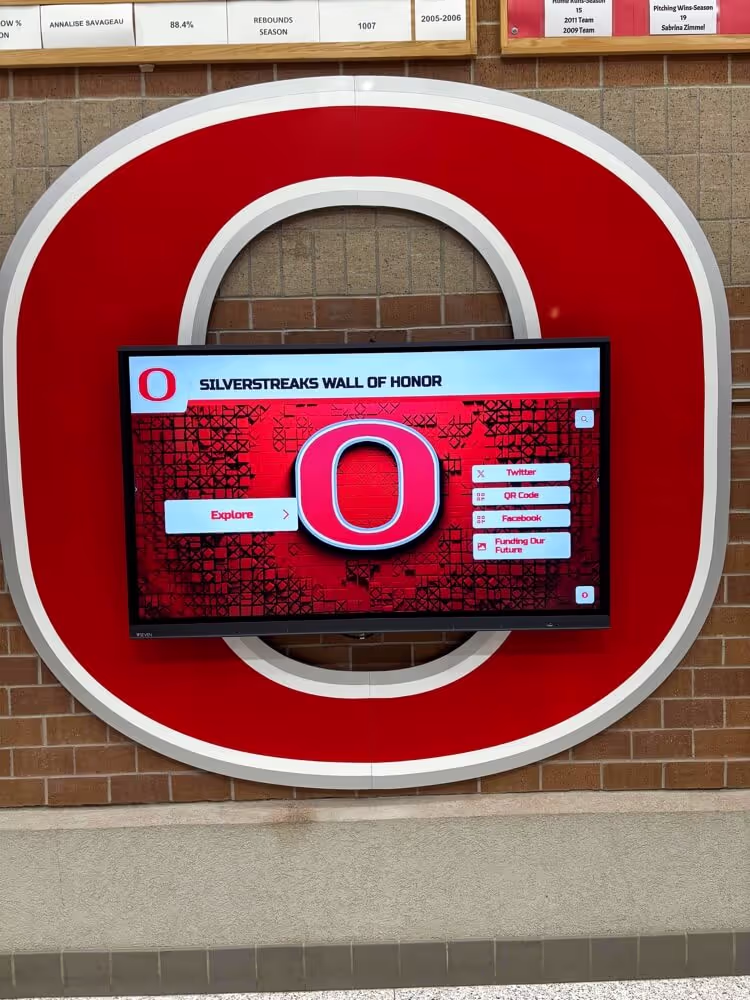
Schools showcase graduate achievements through modern digital displays alongside traditional yearbooks
Hairstyles That Work Best with Graduation Cap Headbands
Your hairstyle choice significantly impacts how well your graduation cap headband photographs and how comfortable you’ll be wearing it. Here are proven styles that complement grad cap headbands beautifully.
Best Hairstyles for Long Hair
Long hair offers the most versatility for styling with graduation cap headbands. These options photograph beautifully while keeping your accessory secure:
Loose Waves or Curls: Soft, flowing waves or curls that fall past your shoulders create romantic, timeless senior portraits. The volume from curls helps elevate your graduation cap headband, making it more visible in photos. Use a 1-inch or 1.25-inch curling iron to create loose waves, then brush through gently for soft texture. Position your headband after styling, settling it into the wave pattern for secure placement.
Half-Up, Half-Down Styles: This versatile option combines the elegance of updo styles with the softness of flowing hair. Pull the top section of hair back and secure at your crown (where your graduation cap headband will sit) with a clear elastic, then position the headband over the elastic to hide it. The secured top section provides a stable base for your headband while the bottom section adds movement and length. Add curls or waves to the flowing bottom section for extra polish.
Low Ponytail or Side Pony: A sleek low ponytail at the nape of your neck creates sophisticated contrast with your graduation cap headband positioned at the crown. This style works particularly well for formal portraits and keeps hair completely away from your face for crystal-clear photos. For variation, position a side ponytail over one shoulder, then place your grad cap headband slightly off-center on the opposite side for balanced asymmetry.
Soft Updo with Face-Framing Pieces: A loosely gathered updo with intentionally freed face-framing pieces creates romantic senior portraits while ensuring your graduation cap headband remains the focal point. Loosely pin hair at the nape or crown (keeping the pin placement low enough that your headband sits above it), then pull out 2-3 thin pieces on each side to softly frame your face. This style photographs beautifully from all angles and works especially well for students with long layers.
Straight and Sleek: For a modern, polished look, wear long hair straight and sleek. This clean style creates striking contrast with the dimensional graduation cap, making the accessory stand out clearly in photos. Use a flat iron for smoothness and finish with shine serum. Position your headband approximately two inches back from your hairline so it doesn’t push hair forward onto your face.
Hairstyle Options for Medium-Length Hair
Medium-length hair (shoulder-length to just past shoulders) works beautifully with graduation cap headbands with these approaches:
Textured Bob or Lob: A shoulder-length bob or lob (long bob) with added texture, waves, or curls creates perfect balance with graduation cap headbands. The hair length doesn’t compete with the accessory, while the texture adds visual interest. Position your headband where the hair naturally parts or falls, allowing it to nestle into your styled hair rather than sitting on top of it.
Side-Swept Style: Sweep all your hair to one side and secure behind one ear with bobby pins, then position your graduation cap headband on the opposite side where hair naturally lifts away from your face. This asymmetrical style photographs dramatically and works particularly well for three-quarter angle portraits.
Tucked Behind Ears: For medium hair with layers, simply tuck hair behind both ears and position your headband centered on your crown. This clean, simple style keeps complete focus on your face while allowing the graduation cap headband to shine as the primary accessory.
Soft Curls with Volume: Medium-length hair curled throughout with lifted roots creates beautiful volume that helps elevate your graduation cap headband for better visibility in photos. Tease roots slightly before positioning your headband, allowing it to sit on top of the volume rather than flattening hair.
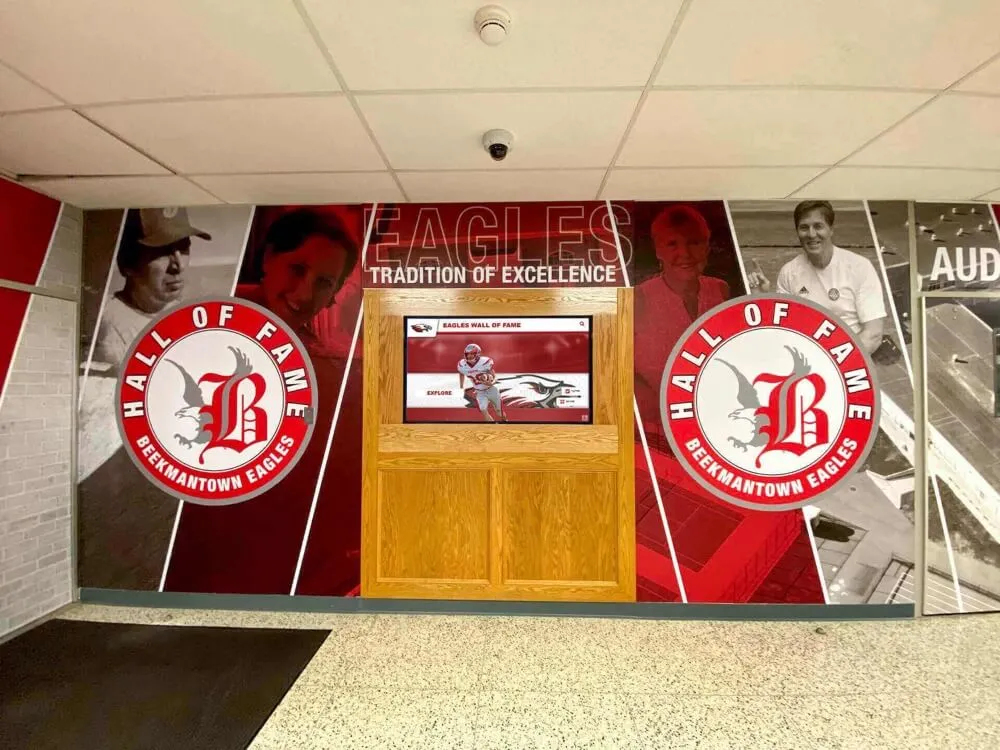
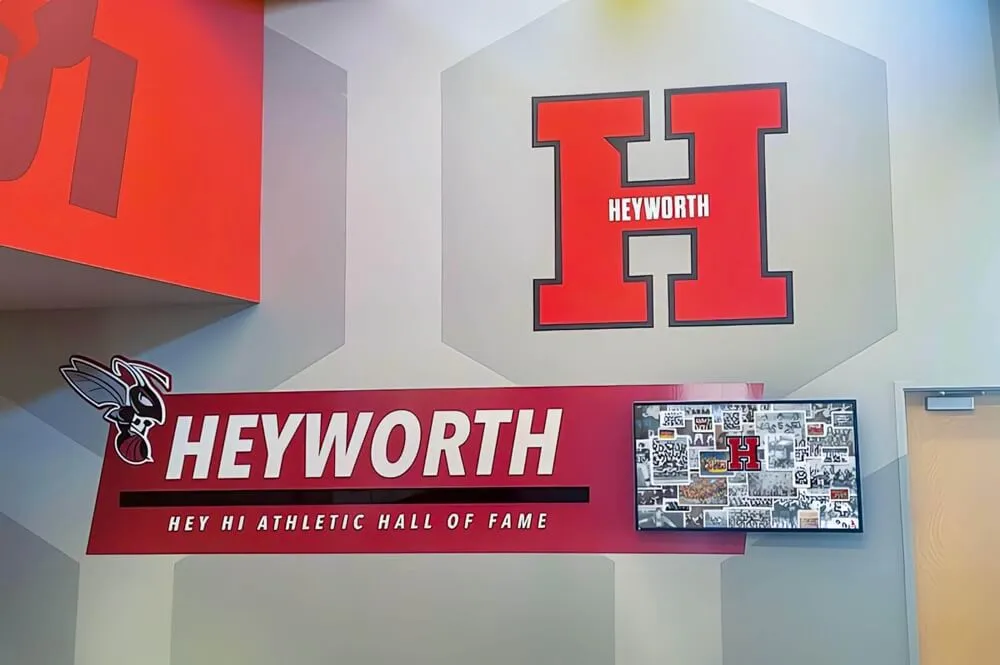
Many schools display senior portraits and graduation photos in digital yearbook systems that showcase students year-round, making professional-looking photos more important than ever.

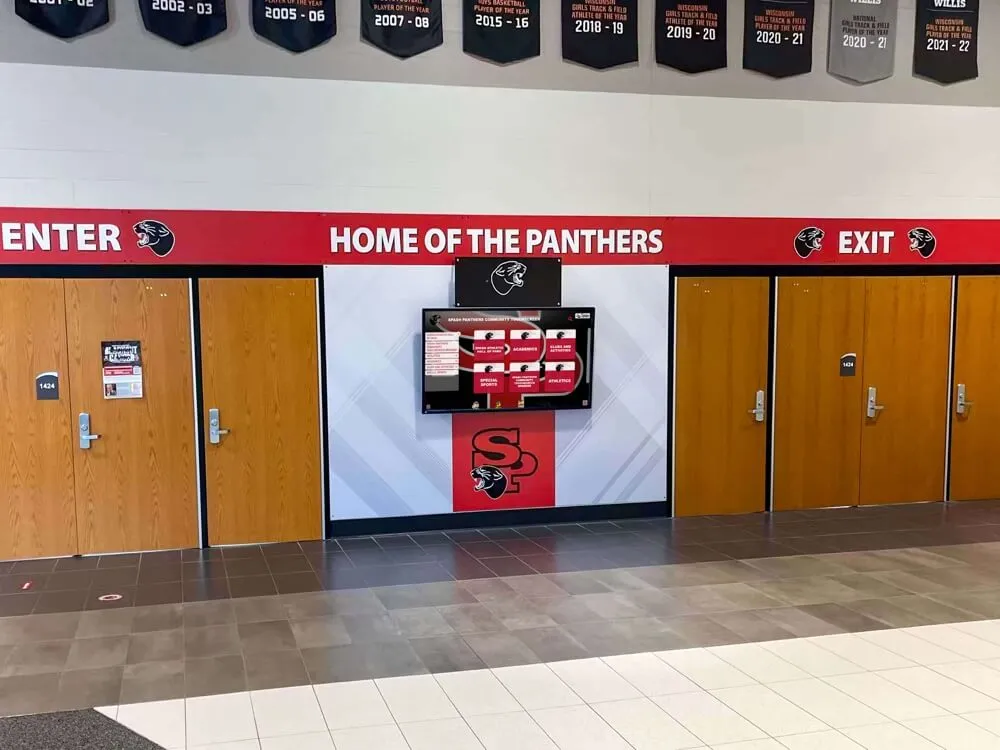
Modern schools feature interactive displays where students can view senior portraits and graduation celebrations
Short Hair Styling with Graduation Cap Headbands
Short hair (pixie cuts, short bobs, or chin-length styles) can absolutely work with graduation cap headbands—the key lies in proper positioning and styling:
Pixie Cuts: For very short hair, position your graduation cap headband slightly further forward (about one inch from your hairline) than you would with longer styles. The closer positioning helps the headband appear integrated with your hair rather than floating above it. Add texture with styling paste or pomade, and consider styling hair upward and forward to create height that helps balance the headband visually.
Short Bob: Chin-length bobs work beautifully with graduation cap headbands, especially when styled with volume at the crown. Blow-dry with a round brush, lifting at the roots, then position your headband at the highest point of volume. The lift creates a natural “landing spot” for the accessory.
Asymmetrical Short Cuts: If your short haircut features asymmetry—longer on one side—position your graduation cap headband on the shorter side to create visual balance. The headband becomes part of the intentional asymmetry rather than fighting against your cut.
Textured Short Styles: Short hair styled with visible texture, waves, or curls (created with a small-barrel curling iron or texture spray) provides visual dimension that complements graduation cap headbands. The texture creates enough visual interest that the headband feels like part of a cohesive styled look rather than an add-on accessory.
Hair Color and Graduation Cap Coordination
While most graduation cap headbands come in classic black (matching traditional mortarboards), coordinating with your hair color enhances your overall look:
For Darker Hair: Classic black graduation cap headbands naturally complement dark brown and black hair, creating cohesive looks. The dark-on-dark palette allows your face to remain the focal point while the cap’s silhouette provides shape and symbolism.
For Lighter Hair: If you have blonde, light brown, or gray hair, black graduation cap headbands create striking contrast that photographs beautifully. The contrast ensures the cap remains clearly visible against lighter hair colors in all lighting conditions.
For Bold or Fashion Colors: If your hair is dyed in fashion colors (pink, blue, purple, etc.), consider whether you want your graduation cap headband to match or contrast. Some companies offer colored mini caps matching school colors, which can be especially fun if your fashion color matches your school’s palette.
Photography Tips for Yearbook-Worthy Results
Even with perfect hair and accessory placement, photography techniques determine whether your graduation cap headband photos turn out yearbook-worthy or awkward. Here’s how to ensure stunning results.
Working with Your Photographer
Professional senior portrait photographers have extensive experience working with graduation accessories, but communication ensures you get exactly what you want:
Discuss Your Vision in Advance: Before your session, share example photos showing graduation cap headband looks you admire. Many photographers maintain Pinterest boards or Instagram collections of their best senior portrait work—review these together to identify angles and styles that appeal to you.
Plan Your Graduation Outfit Carefully: Your graduation cap headband will be part of a complete outfit in photos. Most students wear their actual graduation gown or a dressy outfit in school colors. Solid colors typically photograph better than busy patterns, which can distract from your face and accessory. Bring your gown to the session even if you plan some photos without it—having options gives your photographer flexibility.
Request Multiple Angles: Ask your photographer to capture various angles highlighting your graduation cap headband differently. Straight-on portraits show the cap’s face-on perspective; three-quarter angles capture the cap’s dimensional shape; and profile shots can create dramatic silhouettes with your tassel and cap outline.
Indoor vs. Outdoor Lighting: Discuss whether your graduation photos will be indoors or outdoors. Natural outdoor lighting generally photographs graduation cap headbands beautifully, with sunlight creating highlights on the cap’s surface. Indoor studio lighting with proper positioning prevents harsh shadows that can make headbands look flat.
Angles That Photograph Best
Certain angles consistently produce more flattering graduation cap headband photos:
Slight Three-Quarter Angle: Rather than facing directly toward the camera, angle your body about 30-45 degrees to one side while turning your face toward the camera. This three-quarter perspective captures your graduation cap headband’s dimensional shape (showing it’s a cap rather than a flat decoration) while maintaining strong eye contact with the camera.
Chin Down Slightly: Many people instinctively lift their chin when photographed, but this angle can make graduation cap headbands appear to sit too far back on the head. Instead, bring your chin very slightly downward (not enough to create a double chin, but enough to level your gaze). This subtle adjustment brings your headband forward visually in photos.

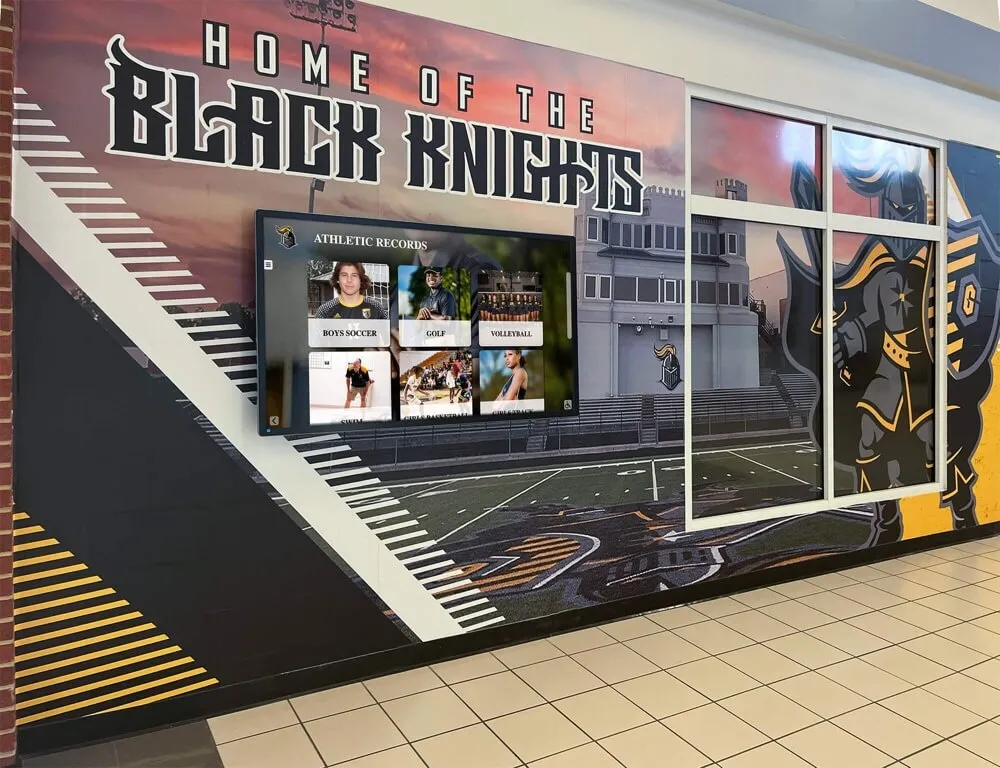
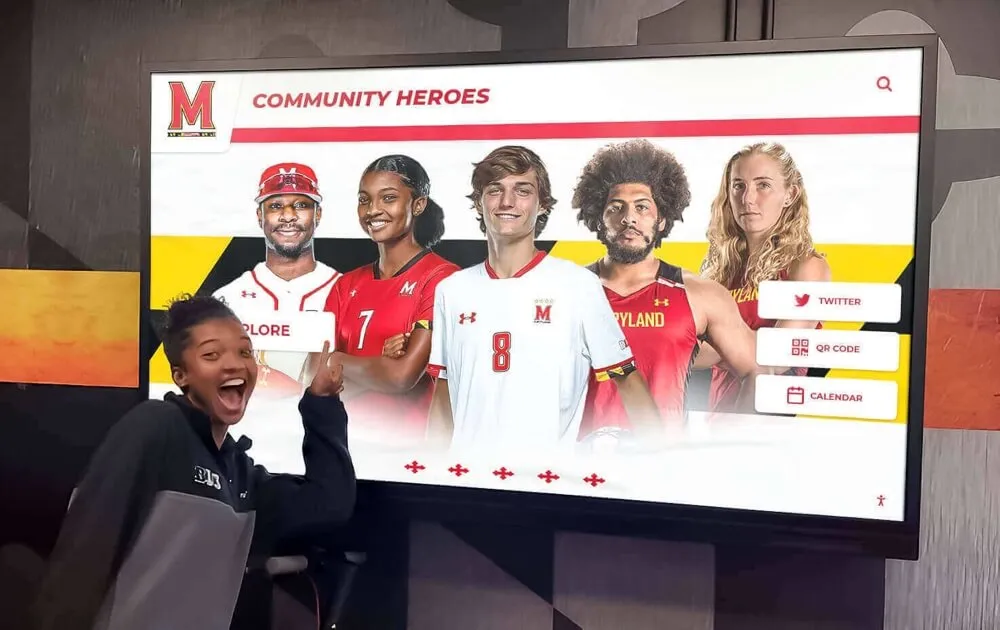
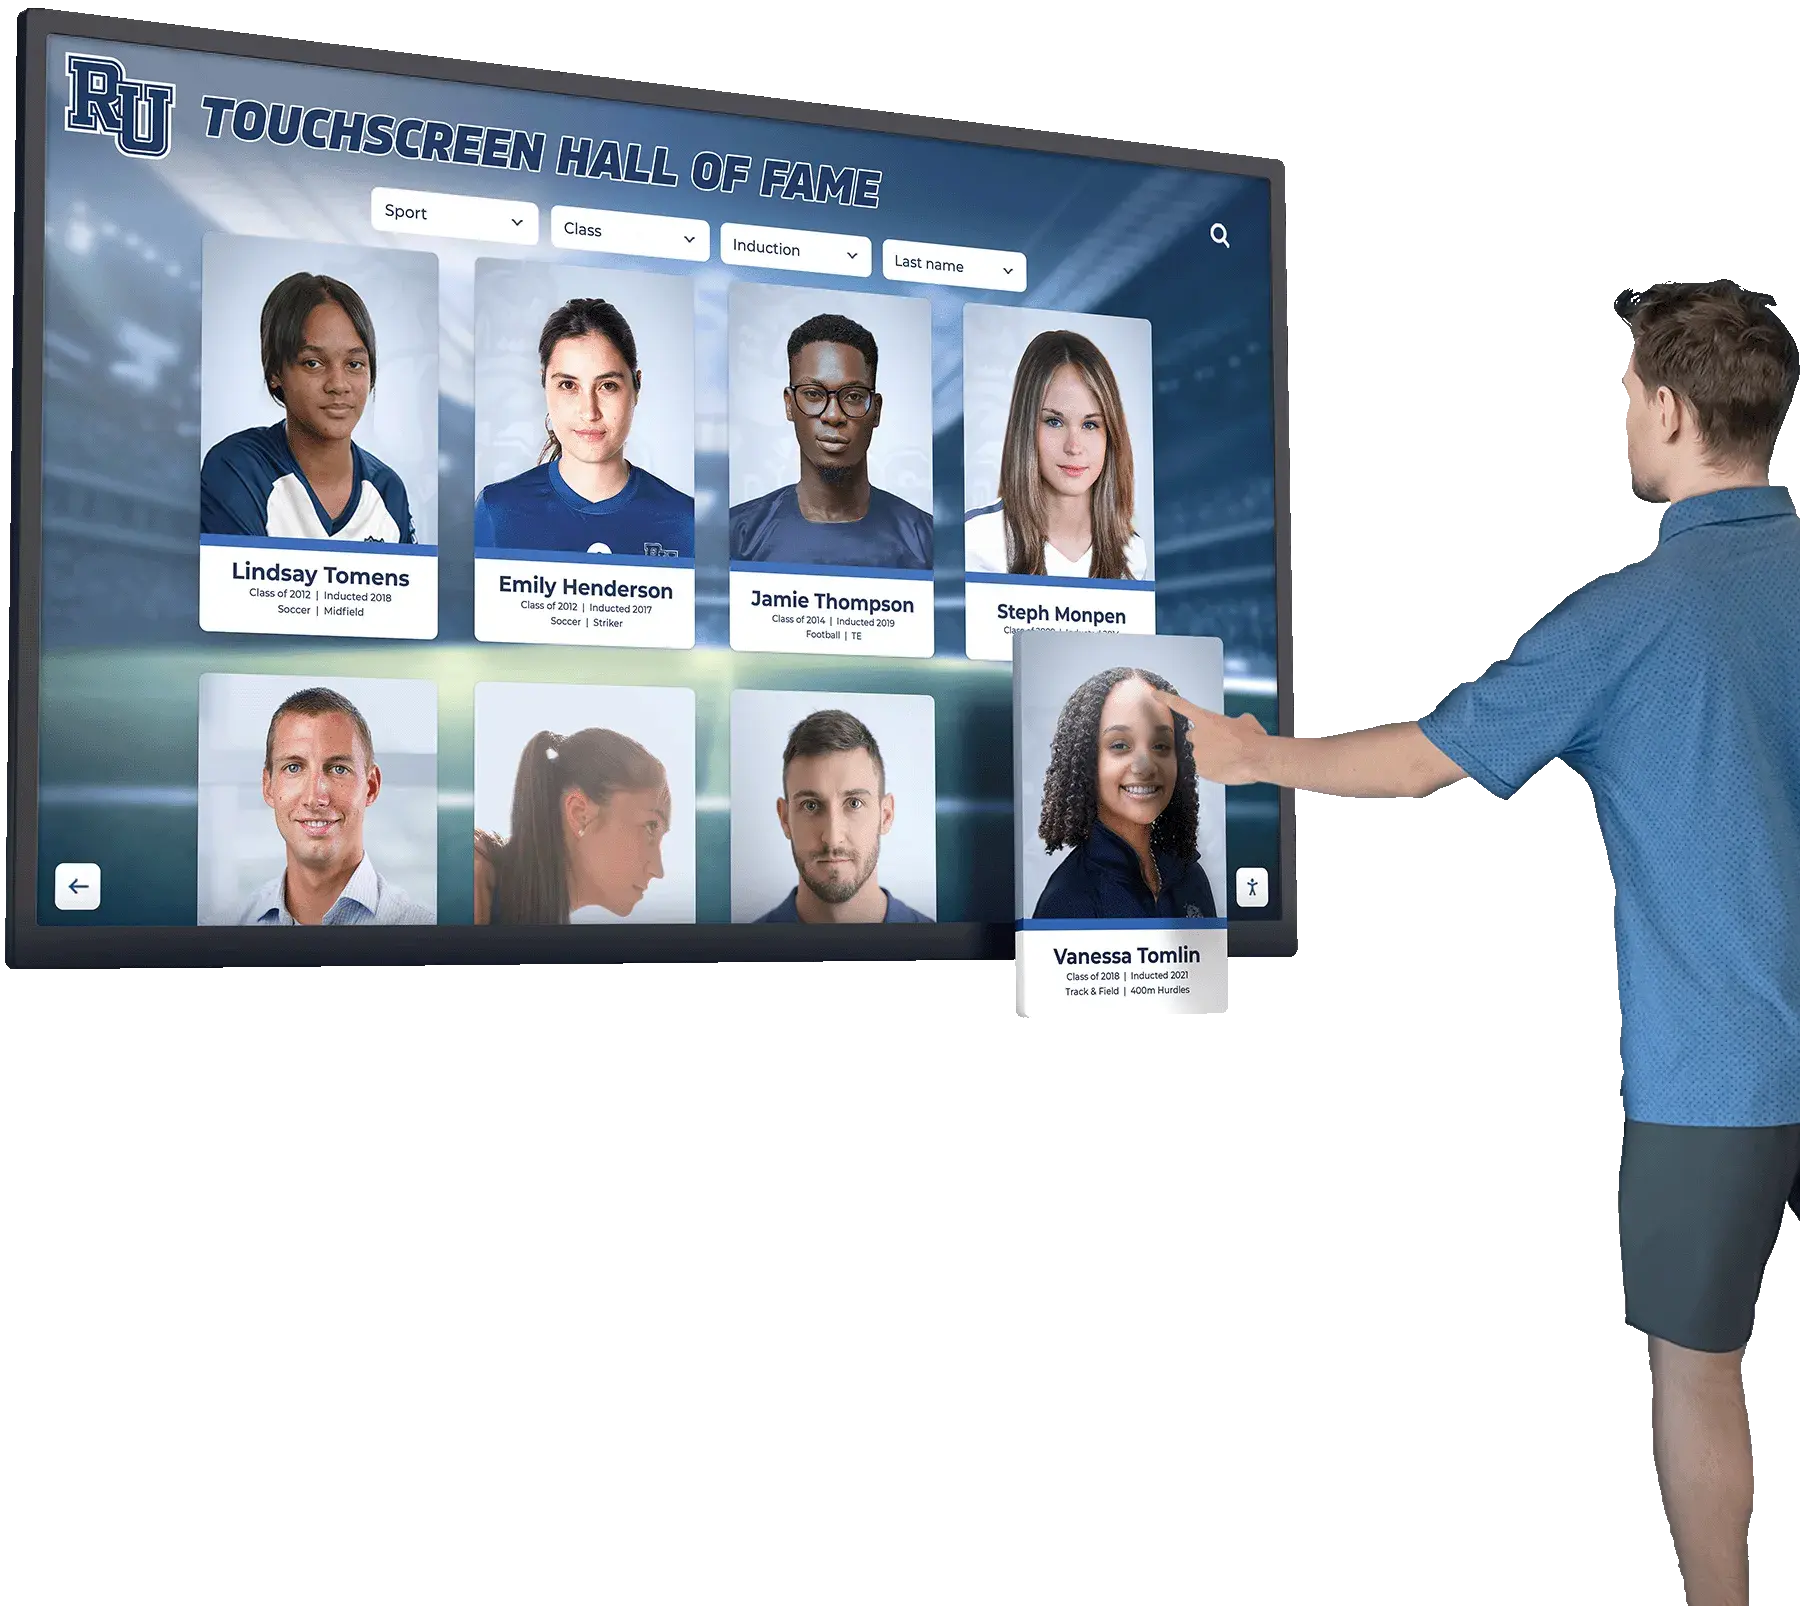
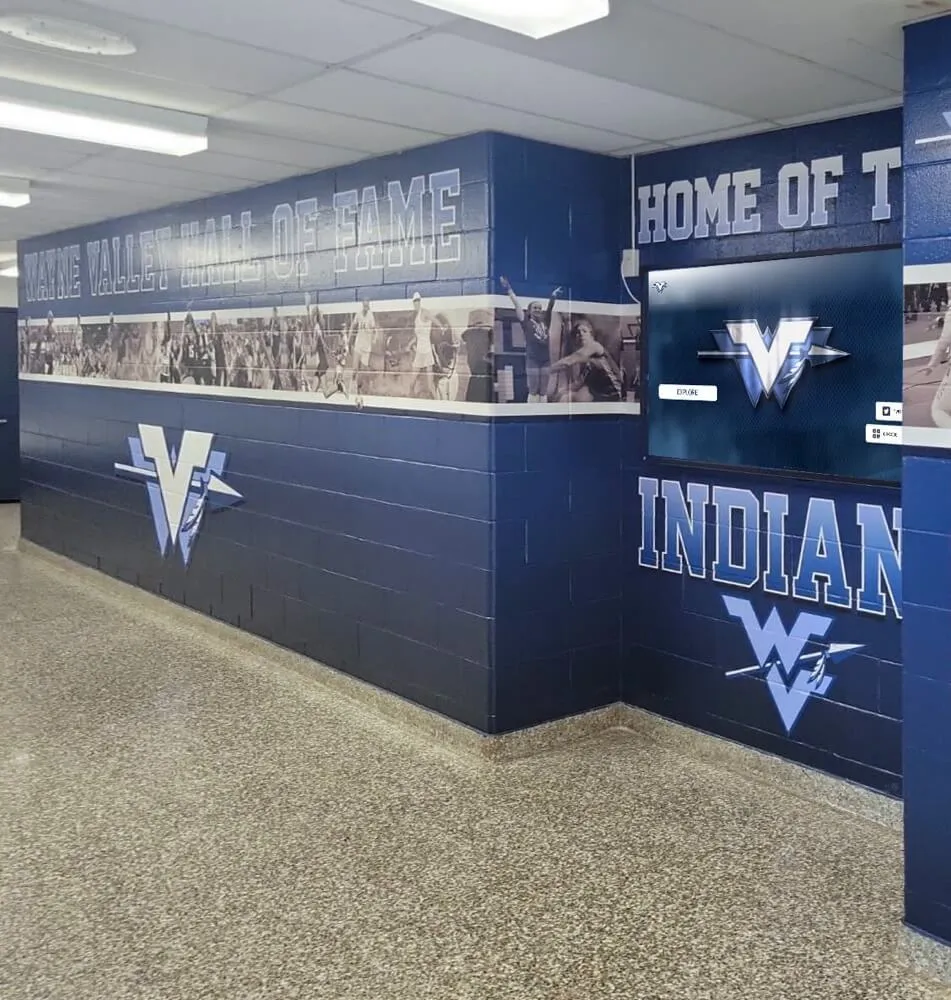
Touch-enabled displays let students and families explore graduation photos and achievement histories interactively
Higher Camera Angle: Shots taken with the camera positioned slightly above eye level (with you looking slightly upward toward the lens) tend to photograph graduation cap headbands more clearly. This angle captures more of the cap’s top surface and creates pleasant overall proportions. However, avoid looking too far upward, which appears strained.
Natural Head Tilt: A very subtle head tilt (about 10-15 degrees) toward your raised shoulder creates more dynamic portraits than perfectly straight head positioning. This slight tilt feels natural and friendly while showing your graduation cap headband from a more interesting angle.
Lighting Considerations
Lighting can make or break graduation cap headband photos:
Avoid Overhead Lighting: Strong overhead lights (common in some indoor spaces) cast shadows downward from your graduation cap headband onto your face, creating the exact problem the headband was supposed to solve compared to full mortarboards. If photographing indoors, ensure lighting comes from in front of you at approximately eye level or slightly above.
Golden Hour for Outdoor Shots: If taking outdoor senior portraits, schedule during golden hour (the hour before sunset) when sunlight is warm and comes from a lower angle. This lighting illuminates your face beautifully while creating attractive highlights on your graduation cap headband without harsh shadows.
Backlit Photos for Drama: For some shots, intentional backlighting creates dramatic silhouettes with your graduation cap headband outline and tassel creating striking shapes. These work beautifully as artistic alternates to traditional straight-lit portraits.
Reflectors for Fill Light: Professional photographers often use reflectors to bounce light back onto your face from below, filling in any shadows while keeping your graduation cap headband well-lit. This technique ensures even lighting across your entire portrait.
Schools now preserve these important senior portrait moments through digital recognition systems that allow students to revisit memories years after graduation.
Expression and Posing Guidance
Your expression and overall pose matter as much as technical photography considerations:
Genuine Smiles vs. Forced Grins: The most yearbook-worthy photos feature genuine smiles. Rather than simply saying “smile,” good photographers create genuine emotion through conversation, jokes, or asking you to think about something that makes you happy. Your eyes should smile along with your mouth for the most authentic expressions.
Variety in Expressions: Request a variety of expressions during your session—not every graduation photo needs to feature a big smile. Serious, contemplative expressions; subtle smiles; confident looks; and joyful laughter all have their place in comprehensive senior portrait galleries.
Shoulders and Posture: Stand or sit with shoulders back and down (not hunched or raised toward ears) for confident posture that photographs well. Good posture naturally lifts your head, helping your graduation cap headband sit at its best angle.
Hand Placement: If you’re unsure what to do with your hands, try gently holding your tassel, adjusting your graduation gown, or using simple, relaxed hand positions. Avoid crossing arms (which can appear defensive) or stiff, unnatural poses. Natural hand positions look best in yearbook-style portraits.
Practicing Expressions: Before your photo session, spend time in front of a mirror practicing various expressions and head angles. Find which angles you prefer and which smile feels most natural. This pre-session practice builds confidence that translates to better photos.
Choosing the Right Graduation Cap Headband Style
Not all graduation cap headbands are created equal. Selecting the right style for your needs, aesthetic preferences, and budget ensures satisfaction with your purchase.
Quality Factors to Consider
When shopping for graduation cap headbands, certain quality markers indicate which products will photograph well and wear comfortably:
Cap Construction: Higher-quality graduation cap headbands feature caps made from actual mortarboard materials (firm cardboard or foam board covered with fabric) rather than thin fabric stuffed with batting. Structured caps maintain their square shape in photos and look more authentic. Check product photos carefully—well-made caps have crisp edges and flat surfaces rather than sagging or rounded corners.
Headband Comfort: If you’ll be wearing your graduation cap headband for extended periods (during photo sessions lasting an hour or more, or throughout graduation parties), headband comfort matters tremendously. Look for headbands with cushioned or wrapped interiors rather than bare plastic, which can create pressure headaches. Adjustable or elastic-back options accommodate different head sizes more comfortably than rigid bands.
Tassel Quality: The tassel should be made from actual rayon or polyester tassel material (the same used on real mortarboards) rather than thin ribbon or yarn. Quality tassels have good weight so they drape naturally rather than sticking out oddly. The tassel attachment should be secure—nothing looks worse than a tassel falling off mid-photo session.
Color Accuracy: Most graduation cap headbands come in classic black to match standard mortarboards. However, if you’re ordering colored versions to match school colors, pay attention to color accuracy. Read reviews to see if actual products match online photos, as color variations can be significant with some manufacturers.
Size Proportions: The cap should be large enough to be clearly recognizable in photos but small enough to wear comfortably without looking cartoonish. Most well-designed graduation cap headbands feature caps approximately 3-4 inches square—large enough to photograph clearly from several feet away (typical portrait distance) but small enough to avoid overwhelming your head.
Budget-Friendly vs. Premium Options
Graduation cap headbands range from $8-$40 depending on construction, materials, and seller. Understanding the differences helps you make informed purchasing decisions:
Budget Options ($8-$15): Entry-level graduation cap headbands typically feature simpler construction with fabric-covered foam caps, basic plastic headbands, and attached tassels. These work perfectly well for brief photo sessions and typically photograph fine in images. However, they may be less comfortable for extended wear and less durable if you plan to keep them as keepsakes. If you’re only wearing your headband for a single photo session, budget options are often perfectly adequate.
Mid-Range Options ($15-$25): Mid-priced graduation cap headbands usually offer better construction with sturdier caps, more comfortable headbands (often with cushioning or wrapping), and more secure tassel attachments. These represent good value for most students who want quality products without premium pricing. This range typically offers the best balance of quality, comfort, and cost.
Premium Options ($25-$40+): High-end graduation cap headbands often feature boutique styling with additional decorative elements (rhinestones, ribbons, custom colors), very comfortable headband construction (sometimes with adjustable sizing), premium materials, and sometimes custom personalization options (year, name, or school). These make sense if your headband serves double duty as a keepsake or if you have specific aesthetic requirements not met by standard options.
Where to Purchase
Graduation cap headbands are available from multiple sources, each with advantages:
Online Marketplaces: Amazon, Etsy, and similar platforms offer vast selections at various price points. Amazon provides quick shipping (often Prime-eligible) but variable quality—read reviews carefully. Etsy offers handmade and customizable options from individual crafters, though shipping times may be longer and quality can vary by seller. Check seller ratings and reviews before purchasing.
Party Supply Stores: Physical party supply stores and online party retailers carry graduation cap headbands, especially during graduation season (April-June). The advantage here is being able to see and feel products before purchase, though selection may be more limited than online.
School Spirit Shops: Some high schools and colleges operate spirit shops selling graduation-related products including cap headbands in school colors. These often match your actual graduation regalia but may be pricier than generic options.
DIY Options: Crafty students can make their own graduation cap headbands using plain headbands, mini cap making supplies, and tassels (all available at craft stores). This approach allows complete customization and can be a fun graduation preparation activity. Numerous tutorials are available online with step-by-step instructions.
![]()
Schools create lasting tributes to graduating classes through permanent displays that showcase senior achievements
Graduation Cap Headband Care and Storage
If you’re keeping your graduation cap headband as a keepsake or planning to wear it to multiple events, proper care extends its lifespan and appearance.
Maintaining Your Headband’s Shape
The cap portion of your graduation cap headband needs special attention to maintain its crisp, square shape:
Storage Between Wearings: Don’t store your graduation cap headband crushed in a drawer or under other items. The cap can easily become bent or misshapen. Instead, store it in a box with tissue paper supporting the cap’s shape, hang it on a hook or display stand, or lay it flat on a shelf where nothing will compress it.
Avoiding Moisture and Heat: Keep your graduation cap headband away from high heat and moisture, both of which can warp the cap’s shape or cause fabric covering to loosen. Don’t store in hot attics, humid basements, or near heating vents.
Transportation to Events: When transporting your graduation cap headband to photo sessions or events, place it in a bag or box where it won’t get crushed. Some students find that baseball cap storage cases work perfectly for protecting graduation cap headbands during transport.
Tassel Care: Tassels can become tangled or kinked. Store your graduation cap headband with the tassel hanging freely or laid straight rather than folded or bunched. If the tassel becomes tangled, gently comb through it with your fingers or a wide-toothed comb to restore straight draping.
Cleaning When Needed
If your graduation cap headband becomes dusty or soiled, gentle cleaning preserves its appearance:
Spot Cleaning: For small spots or stains, use a barely damp cloth with a tiny amount of mild soap to gently dab (not rub) the affected area. Avoid soaking the cap, which can damage the underlying structure or cause fabric to separate from the base.
Dust Removal: Regular dusting with a soft, dry cloth keeps your graduation cap headband looking fresh if you’re displaying it as a keepsake. Compressed air (like that used for electronics) can remove dust from tassel crevices without damaging fibers.
Headband Cleaning: The headband portion can be gently wiped with disinfecting wipes or a damp cloth to remove oils from skin contact. Make sure it dries completely before storage to prevent mildew or deterioration.
Long-Term Preservation as Keepsake
Many students keep their graduation cap headbands as meaningful keepsakes alongside diplomas, graduation programs, and yearbooks:
Shadow Box Display: Creating a graduation shadow box that includes your mini cap headband along with your tassel from your full cap, graduation announcement, diploma, and photos creates a beautiful lasting display. This approach protects your headband while showcasing it prominently.
Memory Box Storage: If not displaying your graduation cap headband, store it in an archival-quality memory box along with other graduation memorabilia. Add a photo of yourself wearing it to help you remember the context years later.
Passing Down Traditions: Some families create traditions of passing down graduation accessories to younger siblings or children. If you think your graduation cap headband might be worn by someone else in the future, extra-careful storage preserves it for years.
Schools preserve graduation memories not just through physical keepsakes but through interactive digital archives that future students and alumni can explore.
Beyond the Headband: Complete Senior Photo Planning
While graduation cap headbands represent just one element of senior photos, comprehensive planning ensures all aspects come together for yearbook-worthy results.
Coordinating Your Complete Look
Your graduation cap headband should complement, not compete with, your overall appearance:
Makeup Considerations: If wearing makeup for photos, opt for slightly more dramatic application than everyday wear—makeup that looks natural in person often appears too subtle in photographs. Focus on defining eyes and adding color to lips while keeping foundation smooth and even. Many students hire makeup artists for senior photo sessions to ensure professional, photo-ready results.
Jewelry and Accessories: Keep additional accessories minimal when wearing a graduation cap headband. The headband serves as your statement hair accessory, so avoid competing elements like large earrings or additional hair clips. Simple stud earrings and delicate necklaces complement without overwhelming. If wearing your graduation gown in photos, consider that it will cover most jewelry anyway.
Nail Preparation: Don’t overlook hands—if your senior portraits include poses showing your hands, fresh manicures ensure polish in every detail. Neutral colors photograph well and don’t risk clashing with your graduation colors or outfit.
Outfit Planning: If taking both graduation-themed photos (with your cap headband and gown) and casual senior portraits in the same session, plan outfit changes carefully. Bring everything you need (including spare items in case of problems) and think through the order of outfit changes. Many photographers suggest starting with the most formal looks while you’re freshest and gradually moving to more casual options.
Timeline Planning for Senior Year Photos
Strategic timing ensures your graduation cap headband photos fit seamlessly into your senior year schedule:
Fall Senior Portraits: Many schools schedule yearbook photo deadlines in fall of senior year (September-November), giving students the entire summer to order graduation cap headbands and plan their looks. Fall portraits often feature better outdoor weather and give you time to order reprints before graduation for announcements and gifts.
Spring Senior Portraits: Some students prefer spring portraits (March-May) when graduation feels more imminent and senioritis has fully set in. Spring timing means portraits feel more connected to actual graduation, though it may be too late for yearbook deadlines depending on your school’s schedule.
Multiple Sessions: Consider booking separate sessions—one for formal yearbook portraits including your graduation cap headband and gown, and another for casual senior portraits showing your personality beyond graduation symbolism. This approach prevents time pressure to capture everything in a single session.
Ordering Timeline: If ordering custom or personalized graduation cap headbands, factor in production and shipping time. Etsy custom orders might require 2-4 weeks, while Amazon Prime offers next-day delivery for standard styles. Don’t wait until the day before your photo session to order your headband.
Digital Display Preparation
Schools increasingly showcase senior portraits on digital recognition displays in addition to traditional yearbooks, requiring additional planning:
Image Quality Requirements: Digital display systems typically require high-resolution images for optimal display quality. Discuss file format and resolution requirements with your school and photographer to ensure your graduation cap headband photos will display beautifully on large digital screens.
Portrait vs. Landscape Orientation: While traditional yearbooks use vertical (portrait) orientation, some digital displays incorporate horizontal (landscape) images. Ask your school which orientations their systems use and ensure your photographer captures appropriate versions.
Additional Content Opportunities: Modern recognition systems often include more than just photos—they may incorporate student quotes, achievement listings, or future plans. Digital recognition platforms create comprehensive profiles that honor students more fully than traditional yearbook space allows.

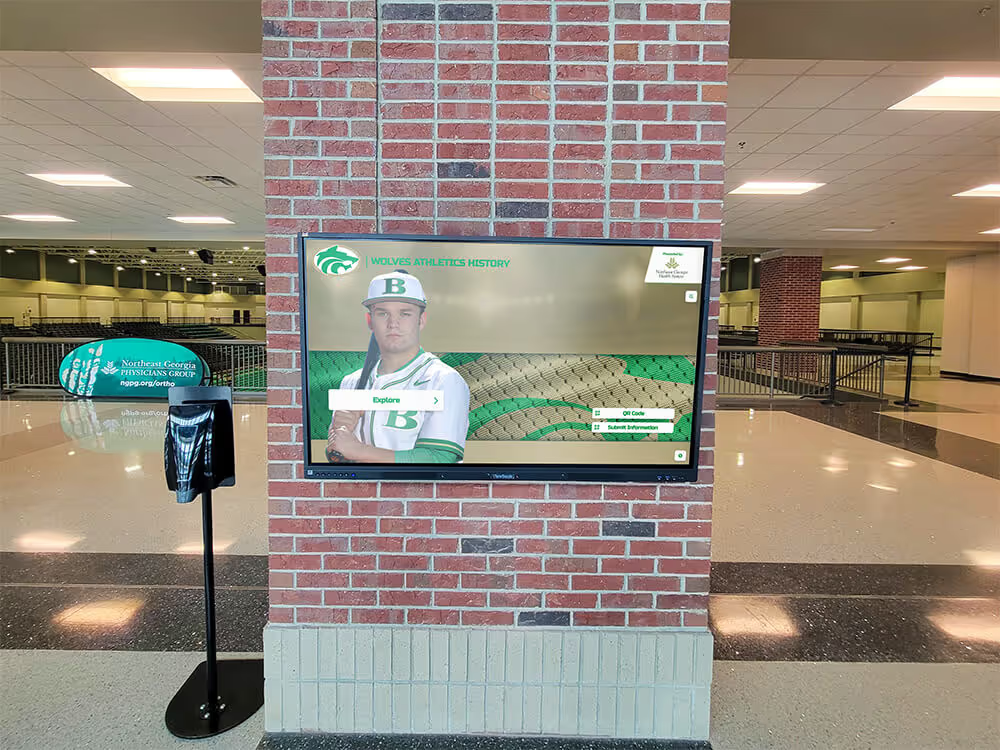
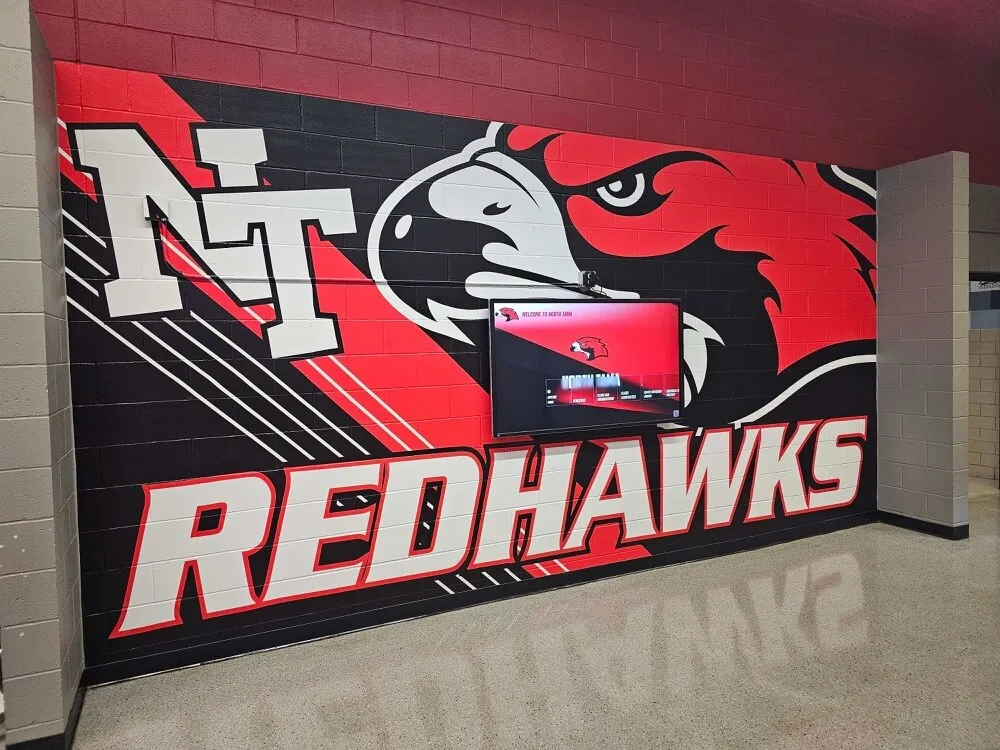
Interactive touchscreen systems allow schools to showcase unlimited senior portraits and graduation photos
Alternative Graduation Photo Options: Headband vs. Full Cap
While graduation cap headbands offer many advantages, understanding when to use full mortarboards helps you make informed decisions about which option suits different photo contexts.
When to Use a Full Graduation Cap
Traditional mortarboards remain the better choice in certain situations:
Official Graduation Ceremony Photos: Your actual graduation ceremony requires wearing full, proper regalia including traditional mortarboards. Photos taken during the ceremony or immediately before/after should feature your complete graduation attire. Save your graduation cap headband for other photo opportunities.
Group Graduate Photos: When photographing with other graduates, matching regalia creates visual cohesion. If everyone else is wearing traditional caps, a headband might look out of place. For formal group graduate photos, coordinate with others about whether you’ll wear full caps or alternative accessories.
Very Formal Portraits: If you’re aiming for extremely formal, traditional portraits mimicking classic graduation photography, full mortarboards better serve that aesthetic than headbands.
School Photo Policy Requirements: Always check your school’s policies about yearbook photos and senior portraits. While many schools allow creative accessory choices, others require specific traditional looks. Following guidelines ensures your photos meet official requirements.
Hybrid Approach: Both Options
Many students use both graduation cap headbands and traditional mortarboards strategically:
Multiple Photo Sessions: Book one session in full graduation regalia with traditional cap for formal portraits, and another session with your graduation cap headband for more relaxed, creative shots that show personality alongside achievement.
Outfit Changes Within Sessions: Bring both your traditional mortarboard and your graduation cap headband to your photo session. Take some portraits in complete traditional regalia, then switch to just the headband for different looks without changing your entire outfit.
Location-Based Decisions: Use your traditional mortarboard for on-campus senior portraits that emphasize your school connection, and use your graduation cap headband for off-campus portraits in natural settings where full regalia might feel too formal.
Purpose-Driven Selection: Choose your traditional cap for photos that will be framed and displayed formally, and use your graduation cap headband for photos intended for social media, graduation party decorations, or casual sharing with friends and family.
Schools increasingly feature graduating students across multiple platforms. Recognition systems can showcase both formal cap-and-gown portraits and more creative graduation cap headband photos, giving comprehensive views of senior classes.
Graduation Cap Headband Fashion: Customization and Personalization
For students wanting to make their graduation cap headbands uniquely their own, numerous customization options allow personal expression while maintaining graduation symbolism.
Popular Customization Ideas
Personalizing your graduation cap headband makes it uniquely yours:
Adding the Year: Many students glue or paint their graduation year on their mini cap’s surface using craft supplies from local stores. Gold or silver paint markers write clearly on black cap surfaces. Keep numbers sized proportionally—too large and they overwhelm the small cap; too small and they disappear in photos.
School Colors and Logos: Paint or add ribbons in your school colors to customize your graduation cap headband for school spirit. Some students edge their mini caps with thin ribbon borders in school colors. Very small school logo stickers or iron-on transfers (carefully applied with low heat) can also personalize caps, though ensure proportions remain appropriate for the small surface area.
Rhinestones and Glitter: For sparkle in photos, carefully apply small rhinestones or glitter to your graduation cap headband. Crystal or pearl accents along cap edges add subtle shimmer without appearing gaudy. If using glitter, seal it well with clear sealant spray to prevent it from falling off and getting on your hair and clothes.
Meaningful Quotes or Words: Very short meaningful words or phrases can be added to mini caps using vinyl letter stickers or careful hand painting. Words like “Finally,” “Class of [year],” or your school motto work well. Keep text very brief—lengthy quotes don’t fit on small surfaces and become illegible in photos.
Floral Accents: Small artificial flowers or greenery attached near the cap’s base (where it meets the headband) add dimension and color while keeping focus on your face in portraits. This works especially well for outdoor senior photo sessions with garden or natural settings.
Custom Colors: If your school has distinctive graduation gown colors beyond standard black, consider ordering or creating a graduation cap headband matching your actual regalia. Many Etsy sellers offer custom color options, or you can fabric-cover a DIY mini cap in your school’s specific shade.
DIY Customization Tips
If personalizing your graduation cap headband yourself, these tips ensure professional results:
Test First: Before applying paint, glue, or other decorations to your graduation cap headband, test your technique on scrap materials with similar surfaces. This helps you perfect your application method and identify potential problems before risking your actual headband.
Less Is More: Err on the side of understated elegance rather than over-decoration. Remember that your face should remain the focal point in photos—the graduation cap headband is an accent, not the main attraction. Subtle personalization often photographs better than heavy decoration.
Secure Attachments: Any additions must be very securely attached to prevent them falling off during photo sessions or events. Hot glue works well for most embellishments (rhinestones, flowers, ribbons), while paint markers or vinyl letters adhere directly. Test security by gently tugging on additions.
Consider Photo Impact: When planning customization, think about how it will appear in photos from typical portrait distances (several feet away). Details that look impressive up close may completely disappear in actual portraits. Focus on elements with visual impact at portrait distance rather than tiny details requiring close inspection.
Symmetry and Balance: Whether adding decorations symmetrically (balanced on both sides) or asymmetrically (accent on one side), ensure visual balance. Step back and view your customized graduation cap headband from several feet away (portrait distance) to evaluate balance before finalizing.
Protective Coating: After customizing your graduation cap headband, apply a light coat of clear acrylic sealant spray (available at craft stores) to protect paint, glitter, or other additions. This prevents customization from flaking or rubbing off during wear and storage.
Preserve Your Senior Memories Beyond Yearbooks
Your graduation photos and senior achievements deserve recognition that lasts. Discover how schools are using modern digital displays to showcase graduating classes in beautiful, interactive formats that students, families, and alumni can explore for years to come.
Explore Digital Recognition SolutionsCommon Graduation Cap Headband Mistakes and How to Avoid Them
Learning from common pitfalls helps ensure your graduation cap headband experience goes smoothly from purchase through photos.
Sizing and Fit Issues
Problem: Headband too tight creating headache or leaving marks, or too loose and constantly slipping.
Solution: If purchasing online, carefully read size specifications and reviews mentioning fit. Many adjustable-back styles accommodate wider size ranges. If your headband is too tight, try carefully stretching it slightly (for plastic headbands), adding cushioning to the interior, or wearing it positioned slightly differently. For loose headbands, bobby pin anchoring (discussed earlier) provides security without requiring a tighter fit.
Last-Minute Ordering
Problem: Waiting too long to order graduation cap headbands, resulting in delayed shipping, paying rush fees, or settling for less-than-ideal options.
Solution: Order your graduation cap headband at least 2-3 weeks before you need it. This buffer accounts for potential shipping delays, gives you time to order a different option if the first doesn’t work out, and prevents pre-photo-session stress. If you do need last-minute options, check local party stores which stock graduation accessories during peak season.
Over-Accessorizing
Problem: Wearing graduation cap headband with too many competing accessories (large earrings, multiple necklaces, additional hair accessories) creating cluttered, unfocused photos.
Solution: Embrace the “less is more” principle for senior portraits. Your graduation cap headband serves as your primary accessory—build the rest of your look around it rather than adding to it. Remove one accessory you planned to wear and see if the cleaner look actually photographs better.
Poor Quality Products
Problem: Purchasing very cheap graduation cap headbands that look costume-like, photograph poorly, or fall apart during photo sessions.
Solution: Read reviews carefully before purchasing, especially for online orders. Look specifically for review photos showing how products actually look (not just promotional photos). Pay attention to comments about durability, appearance quality, and how items photograph. Investing a few extra dollars in mid-range quality typically proves worthwhile for items that will be in permanent yearbook photos.
Ignoring Overall Styling
Problem: Focusing exclusively on graduation cap headband while neglecting hair styling, makeup, or overall appearance coordination.
Solution: View your graduation cap headband as one element of a complete look. Create a styling plan covering all aspects: hair appointment or styling plan, makeup approach (professional or DIY), outfit selection, additional accessories, nail preparation, and overall color coordination. Some students create Pinterest boards or photo collages showing their complete vision to ensure all elements work together.
Timing and Positioning Problems
Problem: Waiting until photo session to put on graduation cap headband for the first time, then struggling with positioning and comfort while photographer waits.
Solution: Practice wearing your graduation cap headband before your photo session. Put it on, check positioning in mirrors, take selfies from various angles to see how it looks, and wear it for 30+ minutes to ensure comfort. Identify ideal positioning and practice placing it quickly. This familiarity reduces photo session stress and helps you communicate clearly with photographers about your preferred look.
When graduation photos are complete, many schools preserve these memories not just in yearbooks but through permanent digital recognition that honors graduating classes year after year.
Making Your Graduation Cap Headband Photos Social-Media Ready
In addition to traditional yearbook photos, most seniors share graduation pictures across social media platforms. Optimizing for digital sharing extends your photos’ reach and impact.
Platform-Specific Considerations
Different social media platforms have specific requirements and best practices:
Instagram: Square or vertical formats work best for Instagram feed posts, while vertical 9:16 format is essential for Stories and Reels. Ask your photographer for vertical crops of your graduation cap headband portraits optimized for Instagram. Use relevant hashtags like #ClassOf2026, #SeniorYear, #GraduationPhotos, and your school-specific hashtags to increase visibility within your community.
Facebook: Facebook accommodates various image orientations well, making it ideal for sharing full portrait session galleries. Create a dedicated graduation photos album allowing friends and family to browse multiple shots including your graduation cap headband photos alongside other senior portraits.
TikTok: For video content, consider creating “getting ready” content showing you preparing for senior photos including putting on your graduation cap headband, or transformation videos showing casual vs. graduation portraits. TikTok’s vertical video format (9:16) should guide any video shooting.
Snapchat: Share behind-the-scenes content during your photo session, including quick shots of your graduation cap headband look before formal portraits begin. Snapchat’s temporary nature makes it perfect for casual, fun graduation content.
LinkedIn: As you prepare for post-graduation life, professional senior portraits featuring your graduation cap headband work well for LinkedIn profile photos or posts announcing your graduation and future plans. Choose your most professional, clearly-composed portrait for professional network sharing.
Editing for Digital Impact
Light editing enhances digital photos while maintaining authenticity:
Basic Adjustments: Most smartphones include editing tools for basic improvements. Slightly increase brightness and contrast if photos appear flat, enhance sharpness moderately for clearer definition, and adjust color temperature if images appear too warm (orange) or too cool (blue).
Filter Wisdom: Instagram filters and similar editing presets can enhance photos but avoid heavy filters that drastically alter your appearance. Your graduation cap headband photos should look like you, not like heavily filtered versions of you. Subtle enhancers typically work better than dramatic filters.
Cropping and Framing: Crop photos to remove distracting background elements while keeping your face as the focal point. Ensure your graduation cap headband remains fully visible in cropped versions—don’t accidentally cut off the top of your head (and your accessory) in the process.
Text and Graphics Overlays: Adding text overlays (“Class of 2026,” your school name, future college, or inspirational quotes) can enhance social media posts, but avoid covering your face or obscuring your graduation cap headband. Place text in background areas or along margins rather than across central portrait elements.
Consistency Across Posts: If sharing multiple graduation photos as a series, consider using similar editing styles for visual consistency. This creates cohesive, professional-looking social media content rather than a disjointed collection of differently-edited images.
Caption Ideas for Graduation Posts
Thoughtful captions complement your graduation cap headband photos:
Reflective: “Grateful for 13 years of amazing memories, lifelong friends, and lessons that prepared me for what’s next. Class of 2026!”
Future-Focused: “One chapter closes, another begins. Ready for the next adventure. 🎓 [University Name] Class of 2030!”
Humorous: “They said high school would be the best four years of my life. They were right (but also college is calling). See you later, [School Name]!”
Grateful: “To every teacher who believed in me, every friend who supported me, and my family who made it all possible—thank you. This cap represents all of us.”
Simple and Classic: “Class of 2026 🎓❤️ #GraduationDay #SeniorYear #ProudGraduate”
Schools extend this social sharing through institutional channels, featuring graduating seniors on digital recognition systems and in school social media content celebrating their achievements.
Conclusion: Your Graduation Cap Headband Journey
Graduation cap headbands represent far more than simple photo accessories—they symbolize achievement, mark important milestones, and create tangible connections to some of the most significant moments in your educational journey. When chosen thoughtfully and worn with confidence, these accessories help you create yearbook-worthy senior portraits that you’ll treasure for decades.
The key to graduation cap headband success lies in preparation and attention to detail. Order quality products with adequate lead time, practice positioning before your photo session, coordinate your complete look thoughtfully, communicate clearly with photographers about your vision, and embrace both the symbolism and fun of this unique senior year tradition.
Whether your graduation photos will appear in traditional printed yearbooks, on modern digital recognition displays in your school’s hallways, or across your social media feeds, the time and care you invest in perfecting your graduation cap headband look pays dividends in images that genuinely capture this pivotal moment. These photos don’t just document your graduation—they celebrate your achievement, personality, and the exciting future ahead.
For schools and families seeking to honor graduates beyond traditional yearbooks, modern digital recognition solutions from Rocket Alumni Solutions create permanent, beautiful tributes showcasing senior portraits, achievements, and milestones. These interactive displays allow current students, alumni, and visitors to explore graduation photos and student accomplishments, ensuring that the pride captured in your graduation cap headband photos lives on long after yearbooks are tucked onto shelves.
As you prepare for senior photos and graduation celebrations, remember that confidence shines through every image. Wear your graduation cap headband with pride, embrace your unique style, and let your genuine excitement about this achievement show. The best graduation photos aren’t necessarily the most perfectly posed—they’re the ones that authentically capture the joy, pride, and promise of this remarkable milestone in your educational journey.
Congratulations, graduate. Your cap headband photos will be yearbook-worthy not because of perfect technique, but because they celebrate the unique, accomplished, ready-for-the-world person you’ve become. Enjoy every moment of this exciting senior year chapter—and photograph it beautifully.